The waterproofing is a multilayer process which I don't think I even realized when I wrote an update two days ago....
First, let's consider the outside stairs. We have three sets of outside stairs. Two sets come down into the front garden and one runs down the east side of the house to the mechanical room. When the contractor (and his various helpers) put in the StuccoWrap, I considered this the "first" layer of waterproofing. Well, there is more to it than that and to show this, let's look at the waterproofing "steps" that have been taken on the outside stairs.
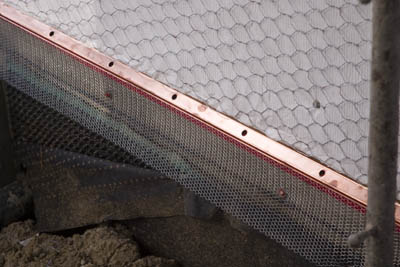
In order to completely waterproof the stairs, first the contractors installed the weep screed (copper pieces). Note how on the stairs, the weep screed is installed perfectly parallel to each step. Then above each piece of weep screed and on any material transitions (for example, plywood to concrete) a rubber-like material called Subseal is applied. You may also note that there is what looks like red electrical tape below each weep screed as well - I have no idea what this is or if it will stay permanently....I will find out.
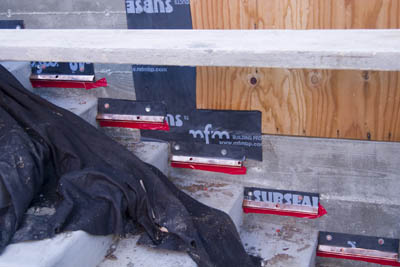
Zooming out slightly, we can see almost the full set of stairs. The lower right section of the photograph below is the section shown in the photograph above. From this photograph, we see that the StuccoWrap is only applied after the weep screed and Subseal. So I was wrong to think the StuccoWrap was the "first" layer, or step, to waterproofing - it is actually the third!
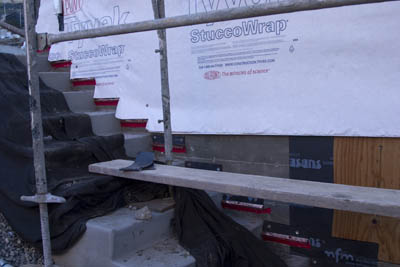
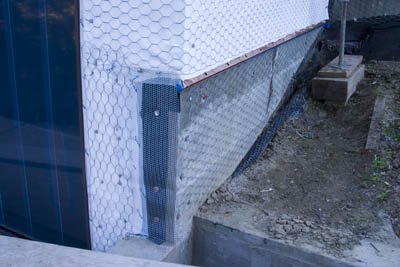
Once the StuccoWrap is up, the entire exterior is covered in chicken wire. Below is a photograph of one of the stairs leading into the front garden demonstrating the finished look after four steps of waterproofing are complete. With the chicken wire in place, we are ready for the next three layers that make up the stucco walls. But that won't happen until we have the drywall up.
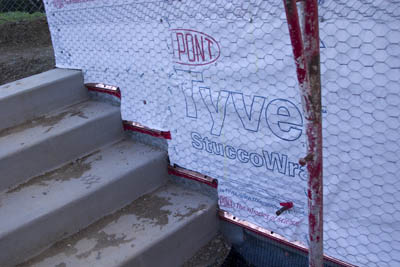
But the stairs are not the only place this elaborate waterproofing is done. The process is repeated on every inch of the exterior.
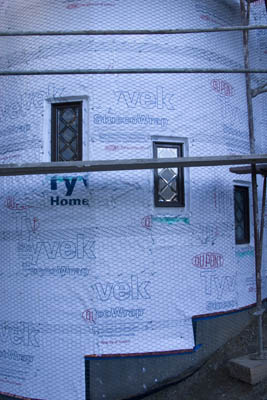
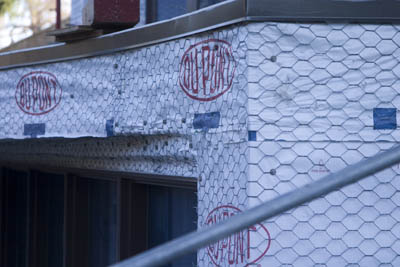
At the back of the house, at the rotunda which will house the amazing sweeping staircase (haven't mentioned it in a while so had to get it in there), we see that the weep screed is installed at the top of each of the stem walls (concrete). Here again the StuccoWrap and chicken wire has been applied. If you look closely, especially at the bottom of the photograph, you can see that there is also chicken wire over the concrete, running all the way down to the black waterproofing material which protects the stem walls underground.

Another view of the rotunda showing the weep screed and thus the StuccoWrap stepping up as the stem walls are stepped.

Oh, another view of the rotunda. This time not only showing the waterproofing, but also the windows.
There are many details which have to be done exactly right in order to ensure a waterproof house. A close up view shows the StuccoWrap and chicken wire above the weep screed and then a finer mesh wire below which fills the space between the weep screed and the underground waterproofing. My guess is that the gauge of the mesh depends on the height between the weep screed and the ground. For example, in the photograph below, the finer mesh is required because the weep screed is close to the final grade whereas in the photographs above, the weep screed is further from the final grade. Only a guess.
Another close up of a corner at the back of the house. Here we see a combination use of the Subseal and the fine metal mesh and chicken wire. I am sure there is a reason to this madness. Oh yea, it is to keep our house dry!
I have focused a lot on the weep screed and the bottom of the walls, but just as important is the top of the wall. In this case, we are looking at the wall section that meets the back deck. The deck itself has its first layer of waterproofing on and the metal flashing has been installed at the edges of the deck and most importantly comes over the edge and OVER the StuccoWrap!
I know you are probably tired of photographs of StuccoWrap by now, but we are very excited about having a dry house after our last experience. Our last house leaked like a sieve. But for all the leaking, the house was not wet enough to keep it from burning down. HAHA
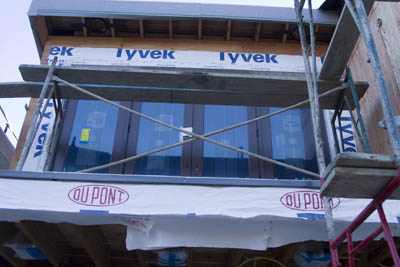
Equally important to keeping our house dry is to have windows installed. To this end, the contractor has completed the installation of the french doors in the master bedroom. Now our view from inside the bedroom is framed by the doors and sidelight windows.
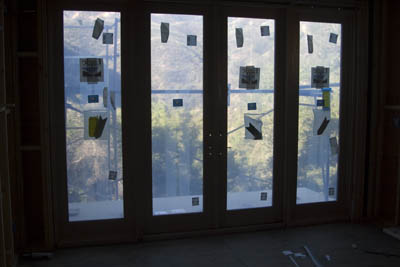
A view of the master bedroom doors from the lower deck (note: not all of the waterproofing has been done on the exterior of the house here)
Further, the bay window of the kitchen has been framed in with lumber in preparation for installation of these windows. Here is the bay window frame from outside.
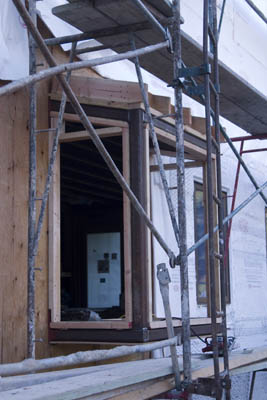
And from inside
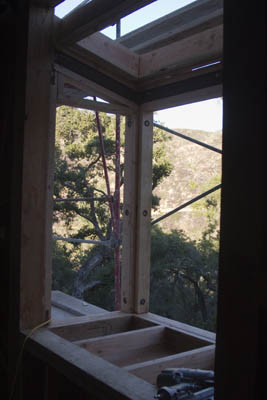
The final bay window will have three sides of glass as well as a ceiling of glass. This way we will get lots of morning light streaming in to the kitchen.
Speaking of light streaming in, the art glass windows reflect a rainbow of colors, both on the window and inside the house.

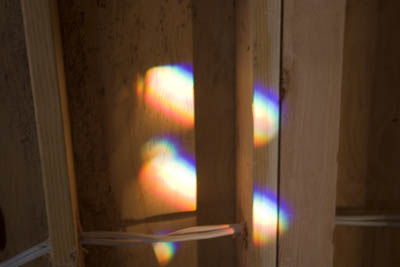
Yes, both of those photographs are out of focus. I plead artistic license... Just look at all the pretty colors.....