On Monday, Art installed our required fire door. Today, they have been working on all the railings, on the decks and on the stairs; another critical step toward temporary occupancy.
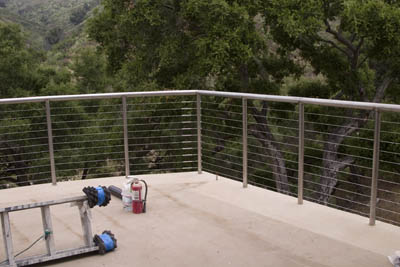
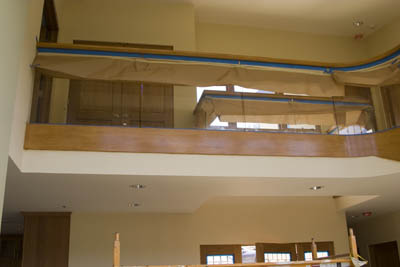
The back decks had posts and top rail installed last week, but now they have all the cable rail as well. The cable rail is required before we can get temporary occupancy so Peter and I don't hurt ourselves falling off the deck. Here is a view of a section of the main deck railings.
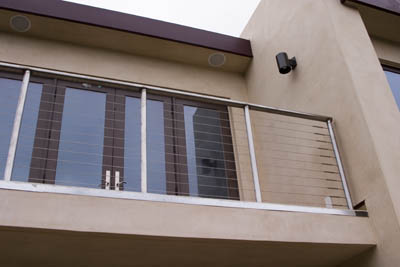
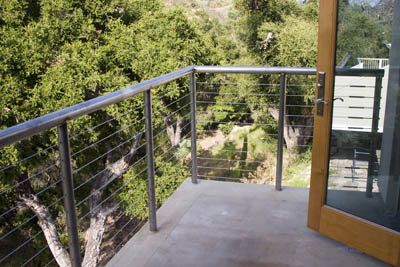
A view of the master bedroom deck railing from the main deck
and from the master bedroom deck.
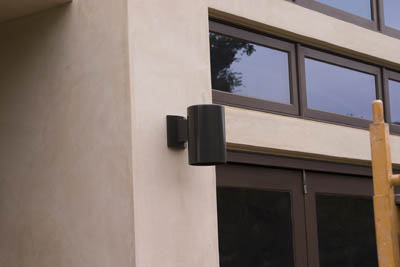
The exterior lights have also been wired and hung. This is not necessary for occupancy (from my understanding), but is a requirement for the finished house.
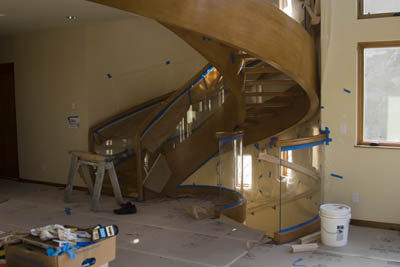
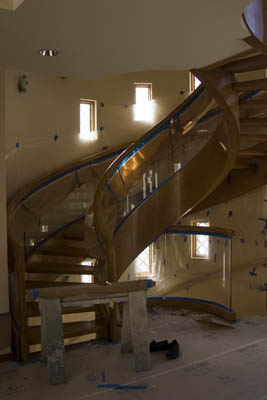
Inside, the stair railing system has to be complete before we can be approved for temporary occupancy. As we have seen before, the glass railing has already been installed, the wood top rail has been dry fitted, and then removed for staining of the glass groove. Now, the top rail is being installed in its final configuration and glued to the glass.

As soon as the rails were set and given some time to dry, the painters came in and stained these top rails.

The entire stair and upstairs landing system have now had the stain applied.

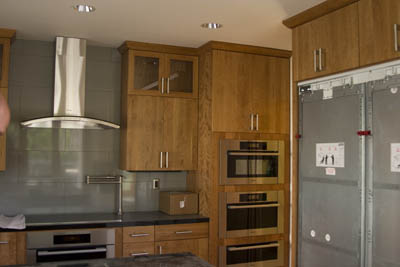
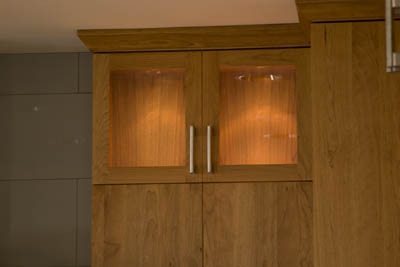
In the other end of the house, the finish carpenters are working on preparing the house for actual living. They have mounted all the cabinet and drawer pulls in the kitchen. Although the city does not require this for occupancy, it will make life much easier when we are living there!
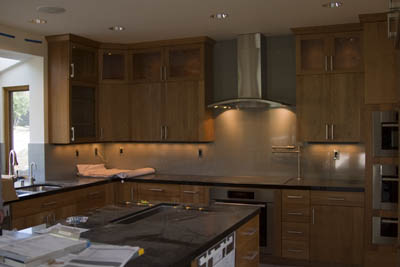
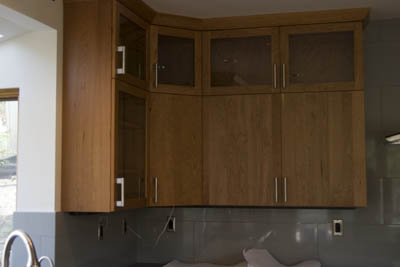
A closer view of the cabinet and drawer pulls
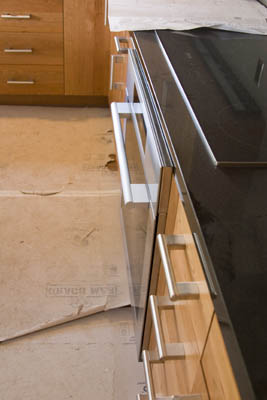
A much closer view of the drawer pulls and the handle of the oven demonstrating that we chose drawer pulls that almost match the appliance handles. They are not quite the same, but were the closest we could find.
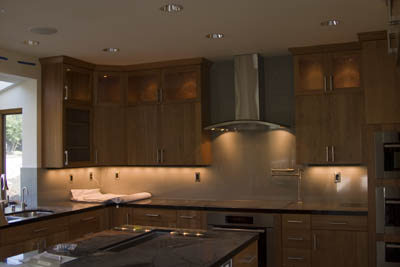
The electrician also wired the under-cabinet and in-cabinet lights for the kitchen so we now have quite the ambiance in the kitchen. Here, the under-cabinet, in-cabinet, and extractor lights are all on.
A close up view of the in-cabinet lights on. These cabinets will be display cabinets as I cannot reach them anyway.
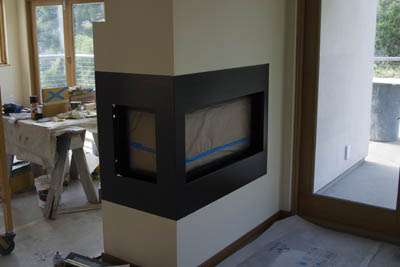
The painters have also repainted the fireplace. This poor fireplace front has taken a beating during the construction process and the paint was chipped and peeled everywhere. It looks very nice with its new paint job!
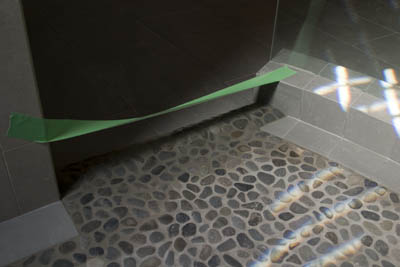
In the master shower, we had a bit of a dilemma! The Shower Tower that we purchased for this shower is amazing. However, it puts out a LOT of water when you are running more than one head. So much water in fact, that it cannot be contained in the shower as it was designed. The shower floor does not have enough slope in it to keep the water in the shower. As a result, when the shower is running, some of the water flows down the drain of the shower, but some of the water flows out the door of the shower and floods the bathroom floor. Fortunately, we did have them put a pan in the entire bathroom so having this water flood the bathroom does not damage the house per se, but it is a little less than convenient. So we need to put in some sort of dam at the threshold of the shower. The dam does not need to be very big as the water just barely makes it over the threshold of the shower.
We considered our options for dealing with this issue, including just using a towel as a dam everyday, and, with the help of the tile man, came up with the following solution to the problem. The tile man came back and installed a section of pebbles laid over a bit of PVC pipe to create a small rounded curb at the entrance to the shower. This should be enough to prevent flooding the bathroom every time we take a shower; although we haven't tested it yet. We are lucky that our contractor did test the original configuration and found the issue at a time when it was easy to remedy!
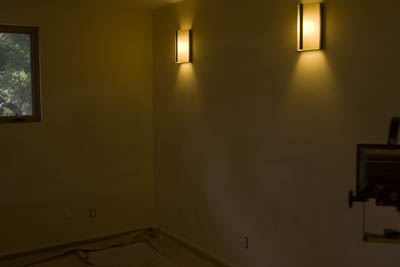
The media room walls continue to plague the drywall contractor. When he finished replastering the walls two weeks ago, he thought he was done. But when the walls were painted and dry, the dry wall patch was even worse than the problem he was originally trying to fix! Originally, we had just a small tape line; it was very visible, but it was just a line. After the repair, we had a six inch swath across every wall of the media room that looked like it was in relief from the wall.
This time, the dry wall has been replastered from the floor to the base of the lights. They are not messing about this time. We are waiting for the plaster to dry, then it will be sanded and painted....again. Then we will see how it looks. No matter what, this will be the last time the dry wall is redone in this room as we are moving in!
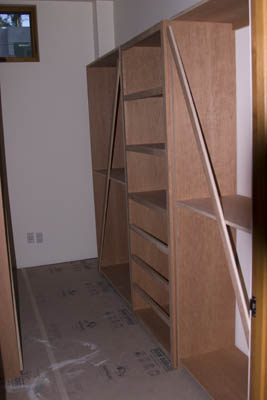
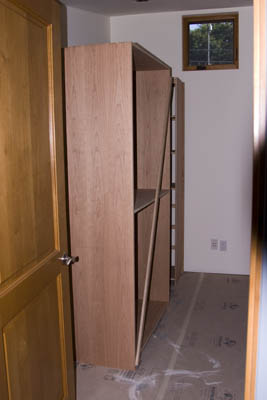
Last weekend, Sean was putting together the closet system for our master closet. The individual sections have been moved up to the master closet and await install next weekend.
We are getting very close now. Tomorrow we have an appointment with the inspector from the city to see if we get temporary occupancy!